If you’re familiar with hosting dedicated servers for games likeValheim, the process should be fairly straightforward.
The benefits of using GPortal are ease of use, and a high performance server.
The downside, of course, is that it’s crucial that you pay for it.

But a few are important for setting up your V Rising server exactly how you want it.
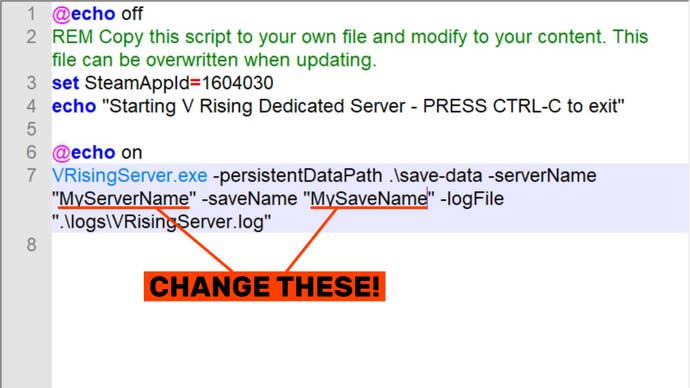
First, right-tap the"start_server_example.bat"file and click Edit.
In the final line, change the following:
Now save and quit this file.

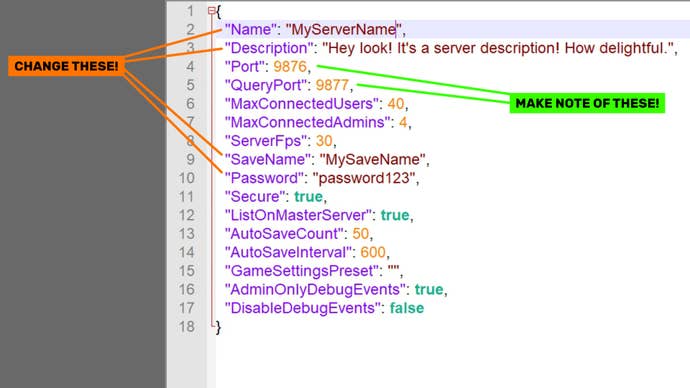
Next, navigate to"VRisingServer_Data/StreamingAssets/configs".
Save and exit this file when you’re done.
To do this, just nudge the"start_server_example.bat"file to launch it.
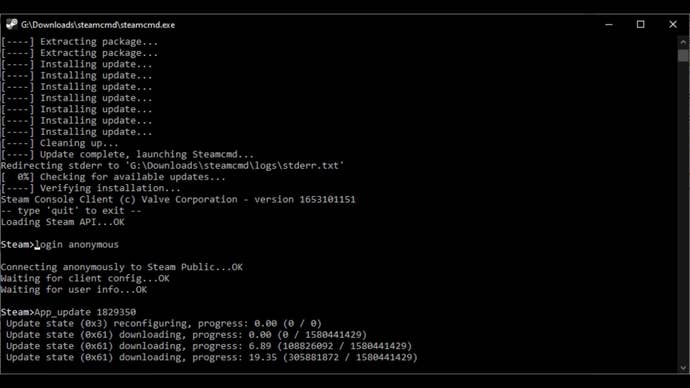
A black window will appear with a couple of lines of text - and that’s it!
Your server is now running.
However, you may run into issues joining the server.
To ensure your server is joinable, have a read of thosePort-ForwardingandFirewallsections below.
After a moment you’ll be prompted to “Terminate batch job (Y/N)?”
Only now it’s a dedicated server.
Good stuff, eh?
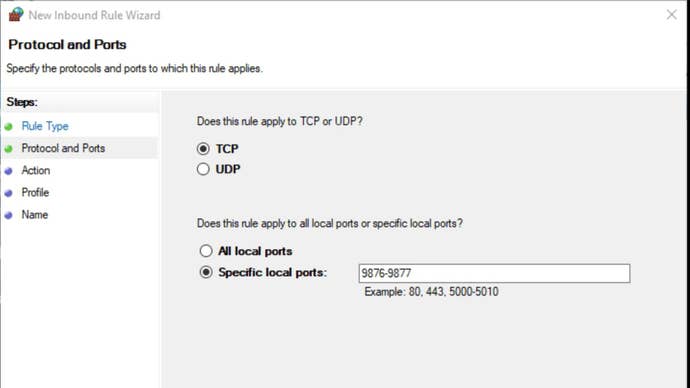
How to set up Port-Forwarding for your V Rising server
The next two steps are very important.
To allow your dedicated server to be joinable, you better set up Port-Forwarding on your router.
Everyone’s router is different, so the process here will be different for everyone.
But the rough steps should be the same for everyone.
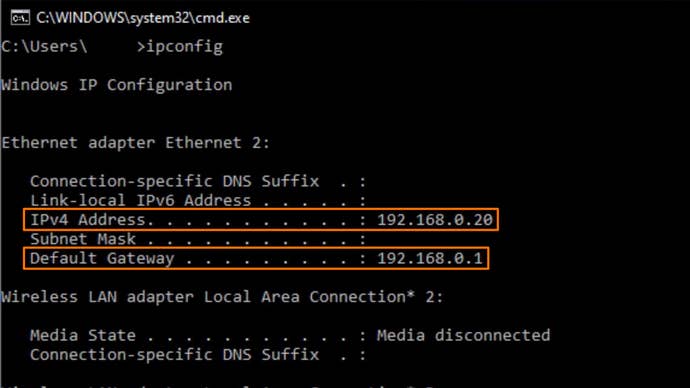
First, you’ll need to know your internal IP Address.
Then punch in in your server’s name into the search bar.
Once you’ve found the server, click"Join Game".
Click this button and you’ll have the option of typing in the IP Address of the server.
Why set up a dedicated server for V Rising?
First: it doesn’t require you to be playing to make it spin up the server.
And it’s very, very easy in V Rising.
This is worth trying if the above step doesn’t work for any reason.
And that’s all there is to setting up your own multiplayer session of V Rising.
Elsewhere you’re free to find ourV Rising best weaponspage, and our guide tobuilding in V Rising.