Quite the oversight, given that unlike Jason Momoas wig, I actually like those things.
Read on or smack the shortcuts below to get started.
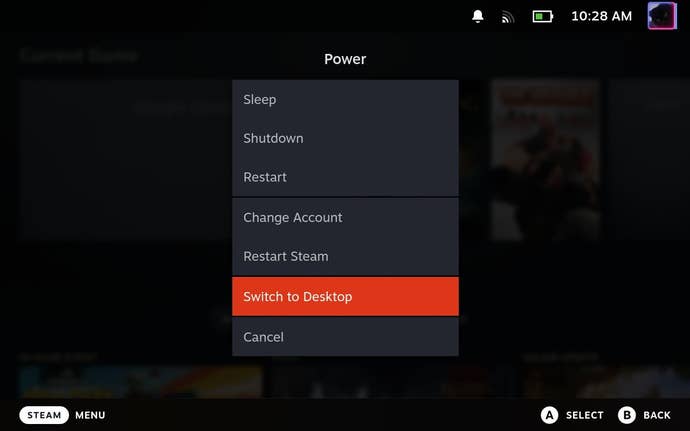
Step 1:Hold down the Steam Decks power button and select “Switch to Desktop”.
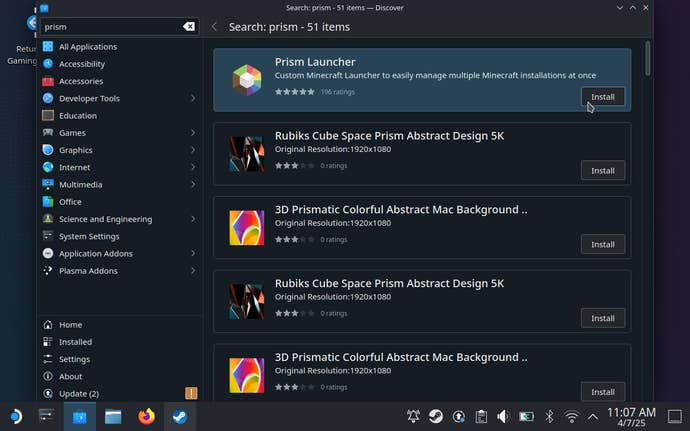
Click “Install” once it shows up in the results.
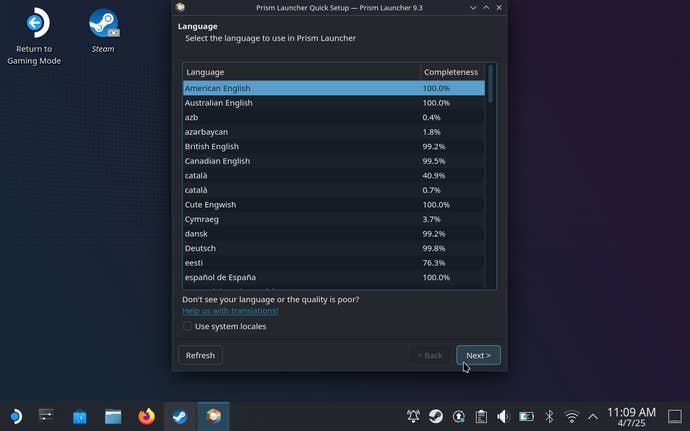
Step 3:Launch Prism Launcher, select a language, and click “Next”.
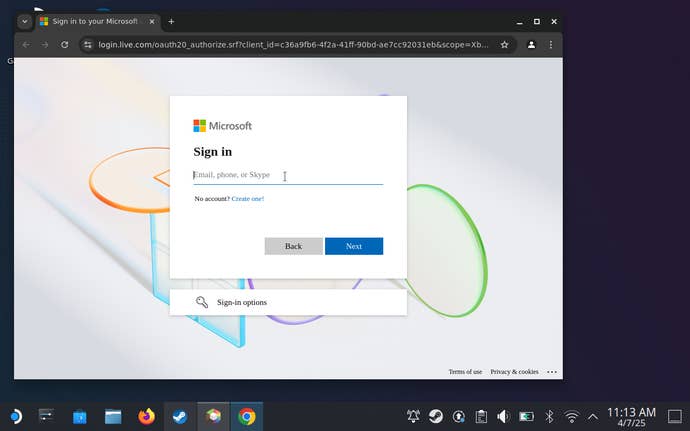
Once signed in on your Deck, grant Prism Launcher access to your account.
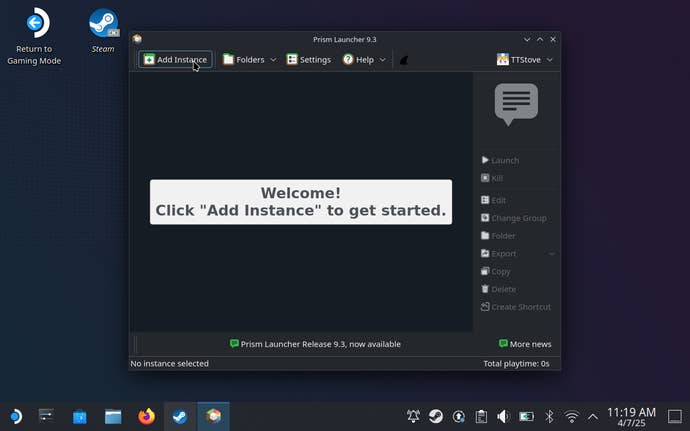
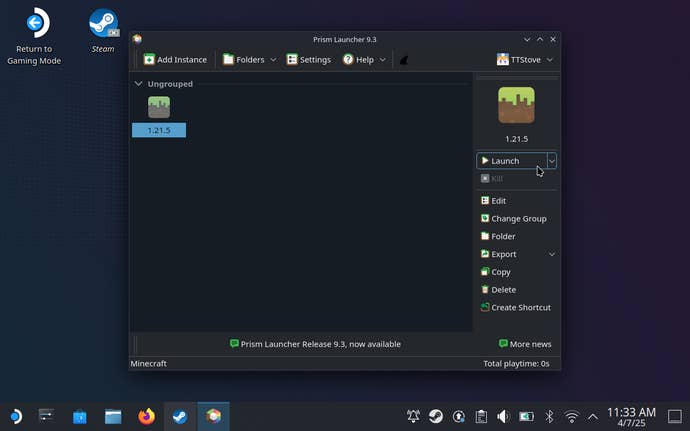
Step 6:You should now be inside Prism Launcher proper.
As it says, your next step is to click “Add Instance” up in the top-left corner.
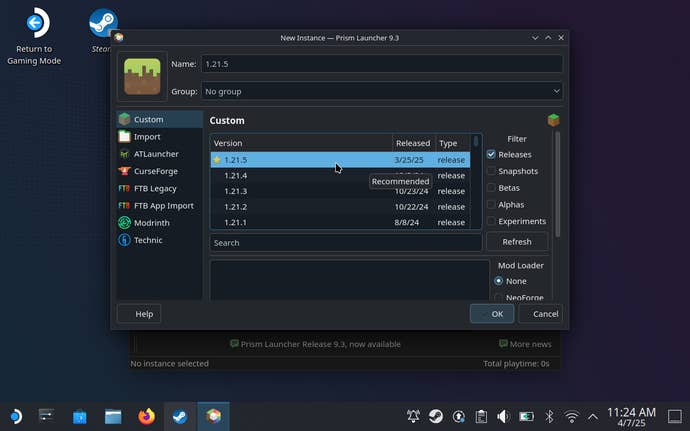
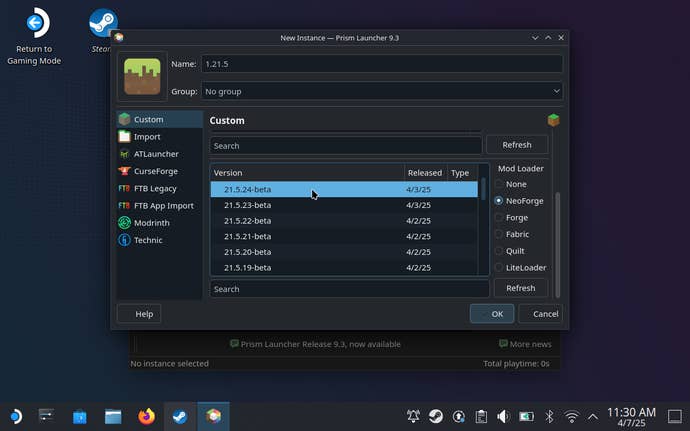
Step 8:Scroll down slightly and youll see the option to add a Minecraft mod loader as well.
As with the list of Minecraft versions, hit the mod loader version you want to install.
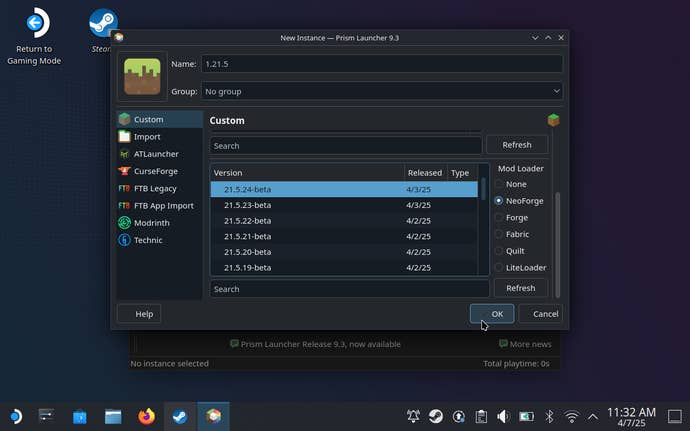
Step 9:With both your chosen Minecraft and mod loader versions selected, hit “OK”.
Prism Launcher will then set about installing Minecraft, along with the mod loader if you selected one.
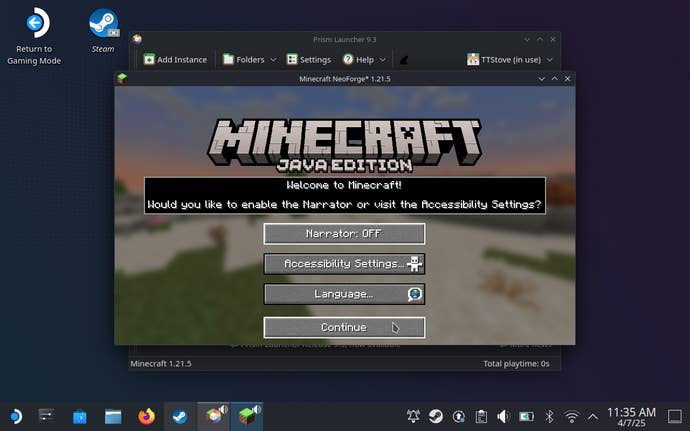
Step 11:After a few moments, Minecraft will launch.
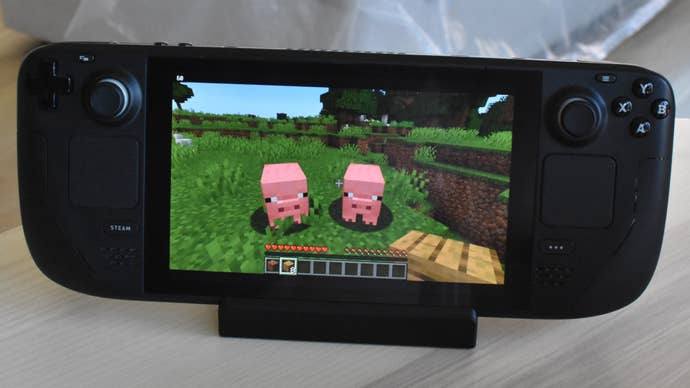
Congratulations: you have technically installed Minecraft on your Steam Deck.
It wont be playable yet, as Minecraft Java lacks proper controller support, which the Steam Deck needs.
Step 13:kickstart your Steam Deck to boot back into Gaming Mode.
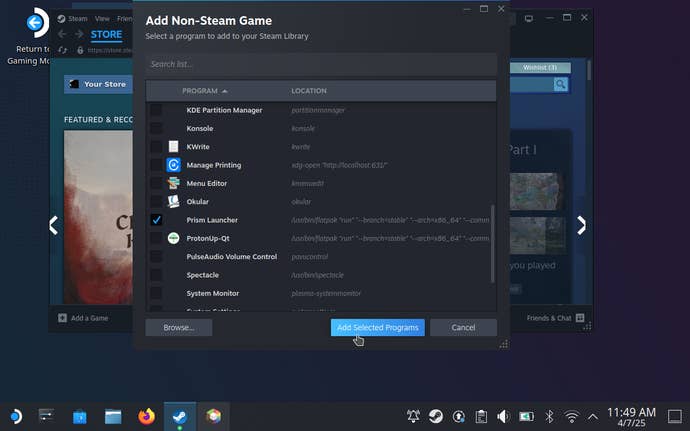
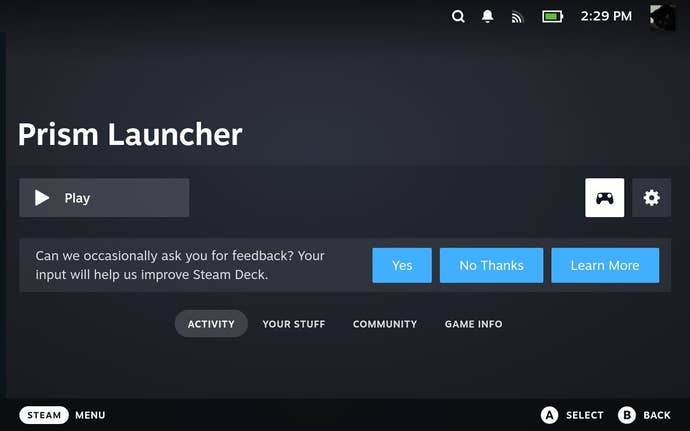
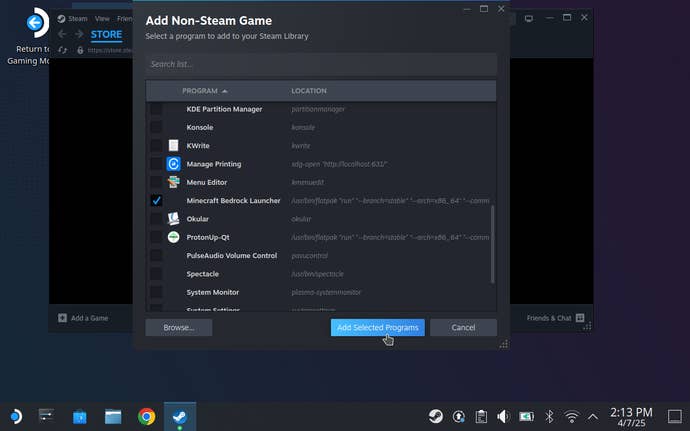
you’re free to now find Prism Launcher in your Steam Library, under the Non-Steam tab.
Select it, but dont launch it yet.
Instead, go for the controller icon on the right to open up Controller tweaks.
Once its downloaded, tap the X button to apply it.
Not if you stick to this.
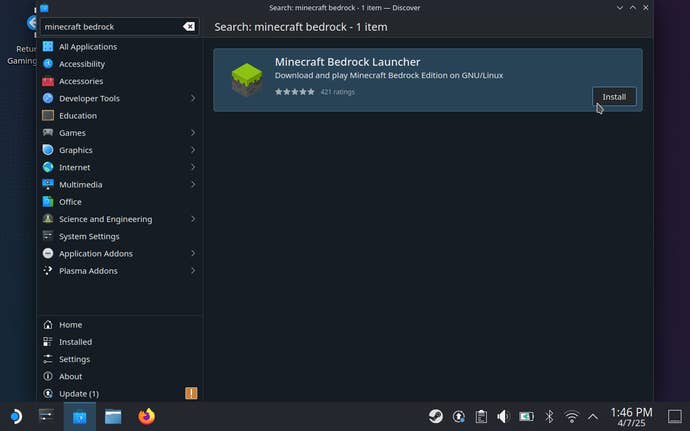
Step 1:Open Desktop Mode by holding down the power button and selecting “Switch to Desktop”.
Step 2:bring up the Discover app, then search it for Minecraft Bedrock Launcher.
Install it once it appears in the search results.
Step 3:pop launch the launcher and click “Continue”.
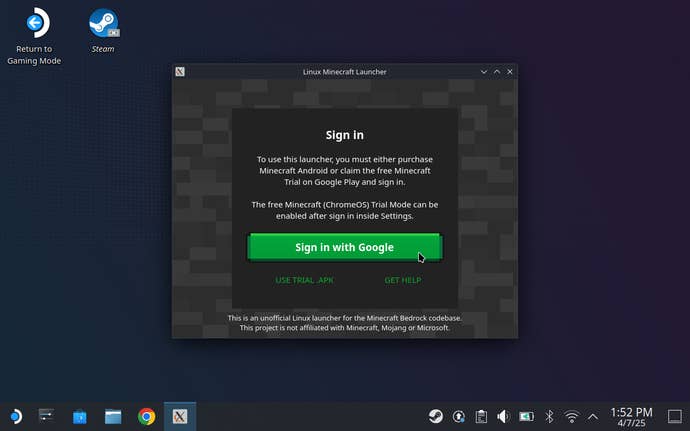
Step 4:Click “Sign in with Google” and, yknow, do that.
Either way, hit “Save and complete Login”.
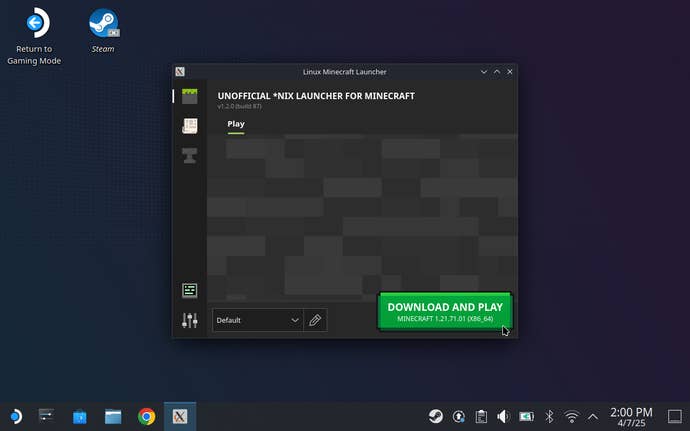
Step 5:Click that big, green, enticing “Download and Play” button.
Within moments, Minecraft will download and install itself onto your Steam Deck.
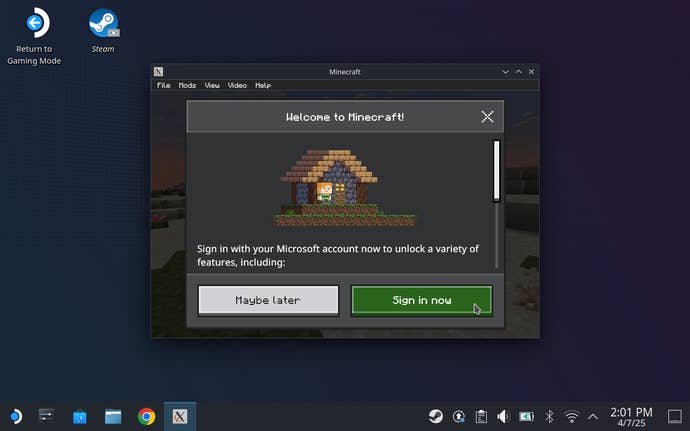
To just play solo, you could simply click “Maybe later” and get into the game immediately.
Step 7:Close Minecraft yes, this sounds counterintuitive, but bear with me and open up Steam.
Step 8:power cycle your Steam Deck.
No need to faff around with community controller parameters here, thanks to Bedrocks built-in controller support.
Ahh, thats better.