Nonetheless, Ive written this guide as such that all three should be covered.

To name a few things.

Id recommend you also take a couple of preparatory steps as well:

All sorted?

An opened Steam Deck on a desk, showing its internal components.

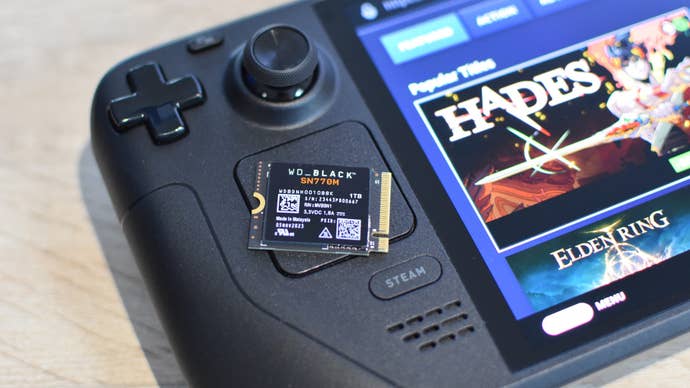
Then enough preamble lets get that new SSD in place.

Select Battery Storage mode and confirm.

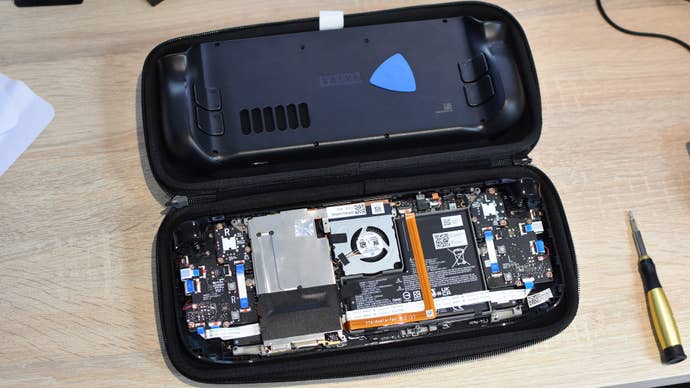
Step 3:With all the screws removed, VERY CAREFULLY remove the Decks back cover.

The WD Black SN770M SSD sitting on top of a Steam Deck OLED.

Avoid touching any of the thermal pads on the underside as you do so.

Step 5:Disconnect the battery connector, which was previously hidden by that plate.

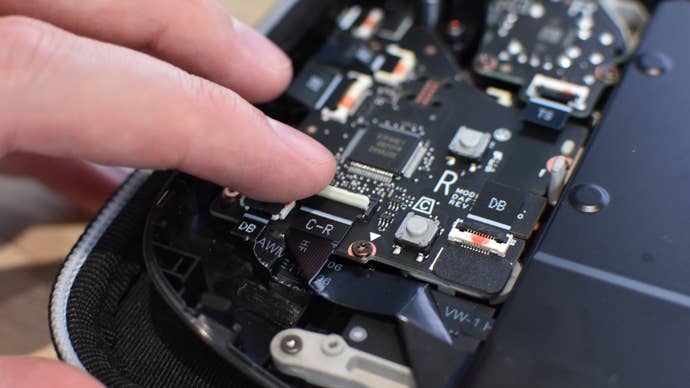
Step 6:Also revealed by the plates removal: the SSD!

Step 1 of how to install an SSD in a Steam Deck: enter Battery Storage mode by holding both the Volume Up and power buttons when the Steam Deck is switched off. This will boot into the BIOS, where you can navigate to Setup Utility, then the Power menu. Activate Battery Storage mode here and confirm.

The new drives screw cutout and the connecting contacts should both be exposed.

On older LCD models, re-cover that third screw with the foil.

On the Steam Deck OLED, dont forget to reconnect that ribbon cable too.

Step 2 of how to install an SSD in a Steam Deck: using an appropriate mini-screwdriver, remove all the screws on the rear of the Steam Deck.

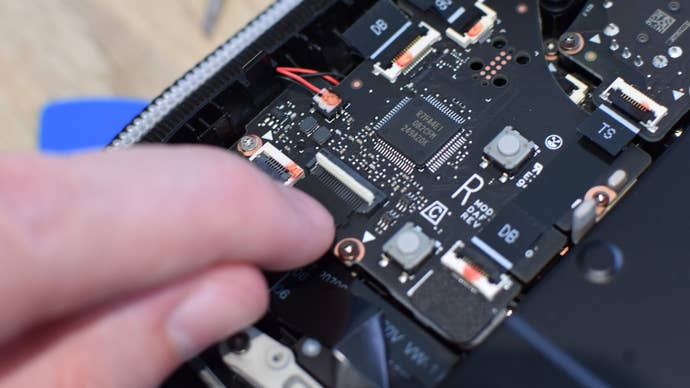
Slide it in fully, then flip the plastic tab back down to secure it.

Step 11:Good news!

Thats the tricky part done.

Step 3 of how to install an SSD in a Steam Deck: remove the Steam Deck’s back cover, ideally with the aid of a plastic pry tool.

Once both the recovery image and Rufus are downloaded, plug in your USB drive and run Rufus.

It should detect and list your drive in the “gear” field.

Finally, click “Start” then “OK” to write the SteamOS image to the USB.

Step 4 of how to install an SSD in a Steam Deck: On LCD models, remove all screws holding the large metal cover in place and remove it. On older models, peel back the small piece of foil to reveal a third screw.

Step 12:Start prepping your Steam Deck for the OS install.

Once everythings connected, hold down the Volume Down button and press the power button once.

After a few moments, your Steam Deck will load up its boot menu.

Step 4 of how to install an SSD in a Steam Deck: On the Steam Deck OLED, disconnect the ribbon cable by lifting up the white plastic tab and carefully removing the cable. Then, remove the two screws holding the metal cover in place, and flip the cover to the right side so it’s out of the way.

snag the “EFI USB rig” option here.

Step 13:Now, wait a bit while SteamOS settles in on your new SSD.

Eventually, youll arrive on a desktop-like screen.

Step 5 of how to install an SSD in a Steam Deck: disconnect the battery connector.

Finally, after waiting a minute or two for the reimaging to complete, click “Proceed” again.

At this point, you’ve got the option to consider your new SSD installed.

Disconnect that USB adapter/hub/dock, get set up, and log into your Steam account.

Step 6 of how to install an SSD in a Steam Deck: Remove the screw holding the SSD in place and gently pull it out opf the M.2 slot.

There are games that need installin.

Step 7 of how to install an SSD in a Steam Deck: remove the protective sleeve from the old SSD and apply it to the new one.

Step 8 of how to install an SSD in a Steam Deck: Insert the new SSD and use the screw you just removed to fasten it in place.

Step  of how to install an SSD in a Steam Deck: On LCD models, reconnect the battery cable and replace the metal cover. On older models, flatten the foil section back down.

Step 9 of how to install an SSD in a Steam Deck: On a Steam Deck OLED, reconnect the battery connectot, then reattach the ribbon cable. Then, screw the metal plate back into place.

Step 10 of how to install an SSD in a Steam Deck: replace the back cover, including all its screws.

Step 11 of how to install an SSD in a Steam Deck: Download the SteamOS recovery image on a separate PC, as well as the Rufus drive writing utility. Plug in a USB drive and use Rufus to write the SteamOS recovery image to the USB.

Step 12 of how to install an SSD in a Steam Deck: Exit Battery Storage mode by connecting the Steam Deck’s power cable and pressing the power button. Then, connect the USB drive via adapter or dock to the Steam Deck. Hold Volume Down and press the power button to open the boot menu, then select ‘EFI USB Device’.

Step 13 of how to install an SSD in a Steam Deck: Use the trackpad to double-click the Reimage Steam Deck shortcut.